Porting my TinyBasic to the W65C134-SXB

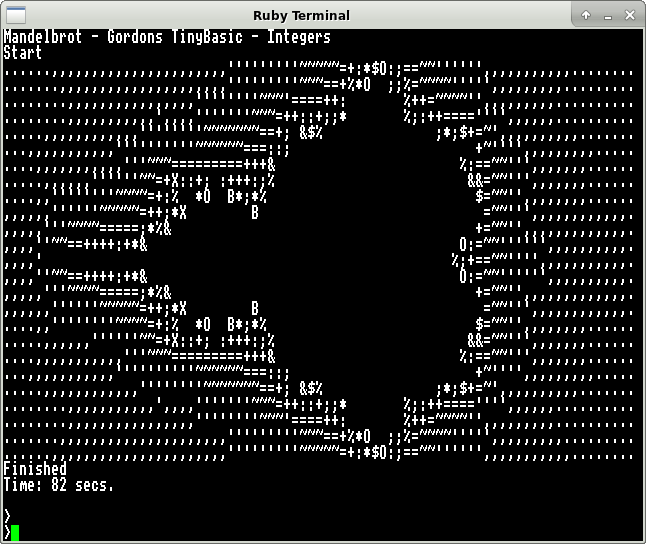
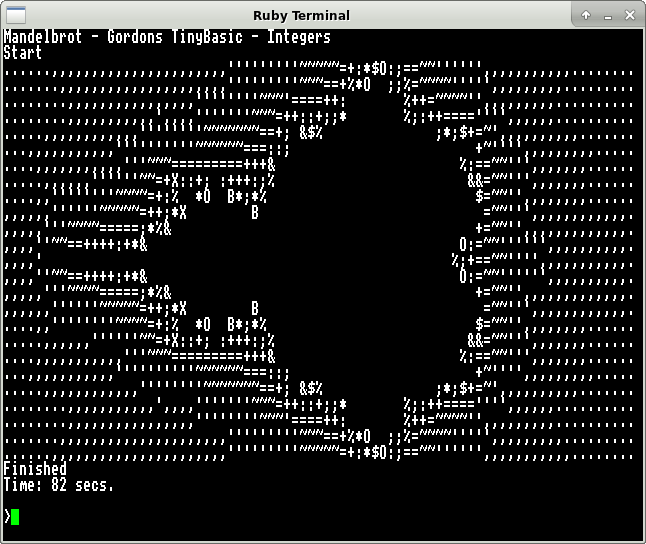
After I was happy running GIBL (my 6502 TinyBasic) on my Ruby board, I thought about porting it – I also thought about a new project I’d like to do over the winter solstice period, so before tackling that project I set about porting it to another platform I had to-hand – the W65C134-SXB board as it has some similarities.

The W65C134

This little board uses the W65C134 microcontroller/SoC. This is a 65C02 based CPU with on-board serial and parallel ports with many options for interrupts and so on. It also has an on-board “monitor” ROM and 192 bytes of RAM. There is no on-board Flash/EEPROM.

By todays standards it’s fairly underwhelming for most modern uses but bear in-mind this was designed and released sometime in the late 1980s or early 1990s (it’s hard to know when) and as such there are no peripherals like SPI or I2C. It also lacks any PWM hardware or analog input.

My preciousssss….

The SoC uses the first 48 bytes of Zero Page for the hardware IO registers. Personally I am not a fan of this – Zero Page is precious and fast and I want all of it… The on-board 192 bytes of RAM is mirrored over page 0 and page 1 and appears from $40 through $FF and the same RAM also appears  at $0100 through $1FF. It’s enough for a tiny application – such as the on-board monitor ROM… And note that this is a mask programmed ROM and not a reprogrammable flash device.

It is possible to add extra external RAM and ROM/EPROM/Flash, etc. and there are register controls to facilitate this – you lose 3 x 8-bit ports though.

The W65C134-SXB

The SXB is a board that comes with the W65C134 and 32KB of RAM and 128KB of EEPROM and a USB interface. There are ways to enable  the RAM and EPROM for your own use and you can write the EEPROM in-situ. The EEPROM is split into 4 banks of 32KB each and it’s also possible to disable the internal ROM and run from the external EEPROM if required.

BASIC?

There is mention in the documentation of a BASIC available for it, (Com Log Basic) but I have searched for it, and can find nothing online…

Getting GIBL on the board was no easy task – the on-board ROM monitor is somewhat greedy with it’s use of Zero Page data and bear-in mind it’s shared with the stack in page 1. Also the data used and locations is not very well documented at all and I had to read the monitor ROM listing to get a better understanding, but I was able to move almost all my nice fast, compact zero page data into external RAM and call the ROM serial routines and I eventually got GIBL running from RAM.

Another small stumbling block – I use Linux exclusively and the WDC tools are for MS Windows only. My terminal of choice under Linux is minicom and it works well, but then another stumbling block – the monitor ROM only outputs a CR (carriage return) with no LF (line feed). So everything is all on one line. Fortunately minicom can cope with this, but it would be nice to not have to work this out.

What was more annoying was that the ROM monitor has an internal routine called CRLF – and you might think that would output both CR then LF, but no. Just CR…

Another issue: The monitor ROM echoes everything back to the screen. Not the best thing when you have a nice get line with editing facilities, so more ROM code searching and fortunately it has a way to turn it off.

I then set about using my RAM based GIBL to write the EEPROM with the intention of moving GIBL into EEPROM. It took some time – then I felt I really really wanted that zero page data back as I was only using a tiny fraction of the monitor ROM, so decided to just turn it off and poke the serial hardware directly.

Which didn’t work as planned as I could not find an easy way to poll the serial hardware – it seems it must be interrupt driven, so had to write my own tiny bootstrap to get the board going with my own serial routines using the bare minimal of zero page. Fortunately there is plenty of RAM so I was able to implement an interrupt driven serial handler with larger (128 byte) input and output buffers. This left a lot more zero page for GIBL so I could move more data back into it which reduced the code size and of-course made it run faster. I also added an interrupt driven 100Hz timer so BASIC programs had access to some simple timing facilities.

Ye Olde Bootstrap Paradox

Then there’s that bootstrap paradox again… You turn the board on and it runs the internal ROM… To get into my GIBL system I type G E000 over the serial line.

Fortunately at power-on, the ROM looks for some magic runes in a fixed area of EEPROM and if present then it does a JMP to another fixed location in the EEPROM… So that code needs to jump to more code (in the GIBL image at $E000), which disables interrupts, turns off the internal ROM, enables the external EEPROM in the ROM location ($F000) then jumps to the EEPROM initialisation code which can setup the serial port the 100Hz timer and re-enable interrupts.

And if your own code should crash then the only option is to remove the EEPROM and erase it with an external programmer and start again…

There is a way to go directly to the external EEPROM, but it involves pulling the BE signal low before you let the reset signal go high and the SXB board doesn’t support that.

Save/Load/DIR/Chain?

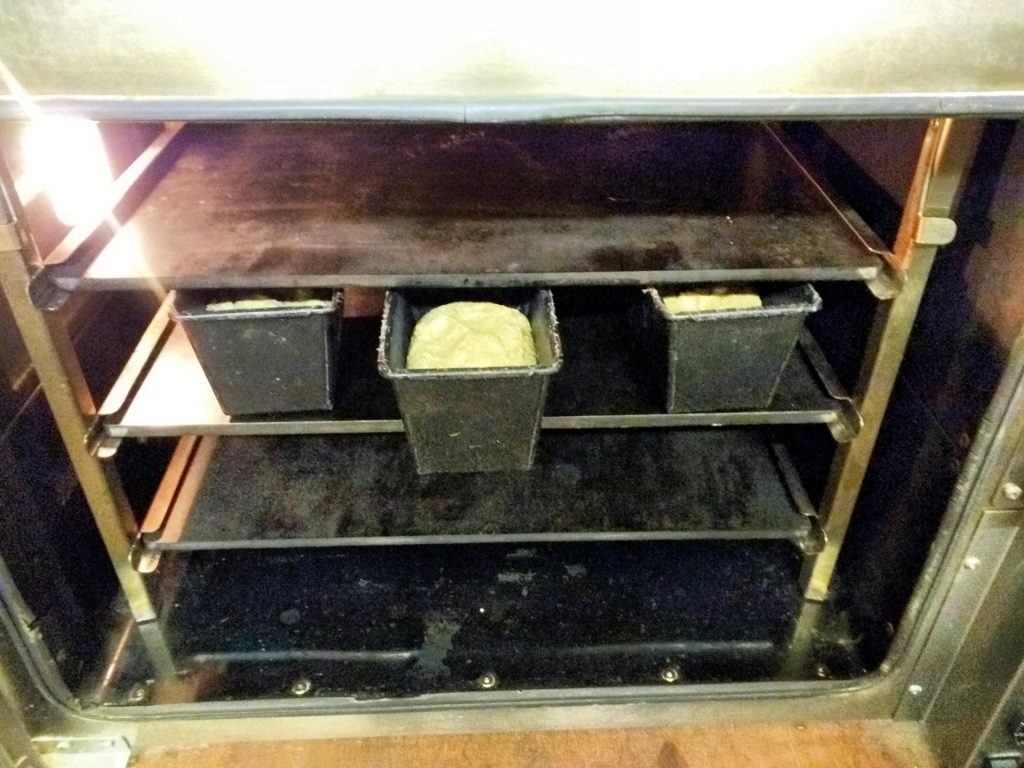
So we have all that EEPROM spare – what about using it for program storage? Sure, so off I went working out how best (or worst) to do it. My aim is to try to keep the bulk of the GIBL code inside the 4K window I’ve allocated myself – this is a Tiny Basic after-all… So rather than write a full filing system, I came up with a plan to split the EEPROM into fixed 4KB, 8KB and 16KB slots and used a simple numbering scheme 0-15. Things got out of hand and with bytes spare I implemented an auto-start routine and a DIR command. The DIR command works by reading the first line of code in each save slot and if it is (a) line 0, (b) starts REM then a space, then the rest of the line will be printed out. If you have a file in slot 15 and it has 0REM!BOOT then it will be loaded and auto-run at power on or reset time.

Example DIR

>DIR
 0: 4K: 
 1: 4K: GIBL Mandelbrot
 2: 4K: Chain Test
 3: 4K: 
 4: 4K: 
 5: 4K: Larson2
 6: 4K: Larson on P5 
 7: 4K: Chain Test 2
 8: 8K: Calculate Pi
 9: 8K: 
10: 8K: 
11: 8K: 
12:16K: 
13:16K: 
14:16K: 
15: 4K: Boot Test (!BOOT)

Slot 15 here has been renamed to stop it auto-starting and the DIR command tells you the size of each slot. To facilitate the auto-start I had to write 2 new commands, Chain and OLD. Tests show that power-on to running the auto-start program takes just under 10mS. The chain command doesn’t wipe variables when it starts the new program.

GPIO?

The SXB board has a number of digital IO pins/ports available to it – some appears to be somewhat haphazard in their use by the board – e.g. one pin in an otherwise free 8-bit port is used for one of the serial handshake signals when there is a spare pin in another port which also has the serial data and the other handshake signal… If that signal had been moved then the board would have had 2 fully unused 8-bit ports… Obviously if you are using the board like e.g. an Arduino Uno as a prototype means before making your own board with the CPU directly on-board then you can use whatever signals you like, but this does seems like a bit of an odd decision to make.

GIBL supports the IO in 2 ways – one is with a new command just for these boards to control the 4 LEDs (LED = n where n is a number which will be output on the 4 LEDs) and use of byte indirection – e.g. to set port 5 to all output and write the value $AA to it:

?&1F = &FF
?&1D = &AA

The ampersand (&) indicates a hexadecimal number and &1F is the data-direction register for port 5 with &1D being the data address for port 5 where you can read or write data from/to.

I made a short (8 minute) video on it all and there is a separate porting document should you wish to put GIBL on your own W65C136-SXB board.


A New Tiny Basic for the 6502

Who would have thought that in 2023 some idiot would write another Tiny Basic for the 6502…

Well, I was that idiot… Because: Why Not!

It all started as something else… Over the summer just past I wrote a new programming language called APRICOT with the intention of making it a tiny but usable thing on the 6502. That hasn’t happened… yet.

But in looking to make a 6502 version or APRICOT, I had a look at all the variants of Tiny Basic there are out there with the view of using one to act as a platform to help me port APRICOT… What happened instead is that I found one on an old platform I have a touch of fondness for so set about re-writing that for the 6502 instead.

That platform was the INS8060 CPU, commonly known as the SC/MP. The name of the implementation was NIBL Short for National (As in National Semiconductor) Industrial BASIC Language.

Coming in at just under 4KB of SC/MP code it was a slightly longer version of most Tiny Basics which tried to get under 2KB wherever possible… However it did have some nice features that I was interested in – namely FOR/NEXT and DO/UNTIL loops.

And given the name NIBL, I felt I had to call it something similar, so GIBL for Gordons Interactive Basic Language) was coined.

As I was rewriting it, I actually thought that the old SC/MP was going to be much more code dense that the 6502 – turns out they’re about the same, although some operations seems easier on the SC/MP due to it having 16-bit pointer registers with a variety of auto increment/decrement modes. However, the 6502 version is currently at just under 3700 bytes of code and runs much faster than the SC/MP version (for many reasons, not just that the SC/MP has a bit-serial ALU)

Download…

So want to get the code? Click here …

But beware – it won’t run on any system other than my own Ruby board, but it might just run as a ROM in a BBC Micro – starting it will require a magic *FX command or unplug BASIC… Or Go into MODE 7, assemble it to run at &4000 load it there and off you go…

… And port

Please read the PORTING.TXT file that’s included with either the TGZ or ZIP file. I’ve made it easier to port now with almost everything in a single file and I’ve also included 2 routines that are part of my RubyOS so you don’t need to write those for yourself.

For other systems… You will need to read and edit the system.s file to work out what to you. Possibly also the data.s file too.

You’ll need to provide your own routines for a number of calls to handle character IO from a terminal. However it should be no worse than porting e.g. EhBASIC for your system, so if you can get that running, then you can get GIBL running.

Examples

There are a few demo programs for it including my new Mandelbrot implementation, but be aware – Tiny Basics are not known for their speed. They do not tokenise the input like MS and newer Basics so there is a lot of string compares going on for every line of code executed.

Have a Mandelbrot because we all love Mandelbrots!

Mandelbrot

GIBL Mandelbrot

And here is the listing:

100 VDU12:PRINT “Mandelbrot – Gordons TinyBasic – Integers”
110 PRINT “Start”
120 !160=0:REM Initialise TIME
130 Z=TOP:$Z=”.,’~=+:;*%&$OXB#@ ”
140 F=50
150 FOR Y = -12 TO 12
160 FOR X = -49 TO 29
170 C=X*229/100
180 D=Y*416/100
190 A=C:B=D:I=0
200 Q=B/F:S=B-(Q*F)
210 T=((A*A)-(B*B))/F+C
220 B=2*((A*Q)+(A*S/F))+D
230 A=T: P=A/F:Q=B/F
240 IF ((P*P)+(Q*Q))>=5 GOTO 280
250 I=I+1:IF I<16 GOTO 200
260 PRINT” “;
270 GOTO 290
280 VDU ?(Z+I)
290 NEXT X
300 PRINT “”
310 NEXT Y
320 Q=!160
330 PRINT”Finished”
340 PRINT”Time: “, Q/100, ” secs.”

History, lest we forget…

The history of Tiny Basic is quite fascinating and starts in 1975. At that point the emerging Homebrew computer Club in California was holding meetings and a couple of enterprising individuals decided to write a BASIC for those computers (mostly Intel 8080 systems), so a chap called Bill Gates and a couple of friends got together and wrote a BASIC for these early systems and sold it for $150 a tape… Some folks thought this was too much and copied the tapes, giving them away for free. Mr. Gates was naturally upset and sent out a stern letter… So with their get on and do it attitude, the Californians got on and did iy and and wrote their own… Starting with Dennis Allison who wrote the initial specification and interpreter for an Intermediate Language (IL) designed to make it easy to implement a BASIC. The rest, as they say is history, but the next year, 1976, a couple of chaps at National Semiconductor (Mark Alexander & Steve Leininger) did a slightly larger and more feature-full implementation for the INS8060 and it’s this version I re-wrote to suite the 6502.

Retro Basic Benchmarking with Mandelbrot

Colour Mandelbrot Image

For a long time I’ve been writing Mandelbrot programs for fun and recently to act as a benchmark for some retro BASIC systems. The output has been variable from simple ASCII text to high resolution colour graphics.

For retro systems… Well, those high resolution graphics are somewhat problematic for a few reasons – one is that the old systems simply don’t have high resolution or multi colour graphics and another is that generating a Mandelbrot is a very compute intensive task. Would you want to wait 2 hours for an image?

So plain-text ASCII it is.

Benchmarking

An issue with benchmarking is that unless you want to cheat (who, me?) then you need to be able to run the same code on every system you have and where you change the code, you need to make it absolutely clear where you change it and why…

So what does it actually benchmark?

Good question.. Traditionally, Mandelbrot does a lot of arithmetic operations – typically floating point in BASICs that support it, but even in integer only BASICs it’s still a lot of calculations. So many that the surrounding loops, etc. make little difference to the overall time – one run I did where I replaced the FOR loops with arithmetic, tests and GOTO was only 2 seconds quicker with FOR loop vs. without on an 84 second run, so if you need to change the FOR loops into tests and GOTOs because the TinyBasic you’re using doesn’t support it, then go ahead. Also this isn’t testing the efficiency of GOSUB nor GOTO which some benchmarks are better suited to.

With this in-mind, developing a “universal” benchmark program in BASIC is quite hard. Some of these old BASICs have strings, some don’t, some have FOR/NEXT loops, some (typically “Tiny” Basics) don’t. Some support 2 or more letter variable names, some don’t, and so on. So developing code that works everywhere with minimal changes is the goal here.

This was my criteria:

  • Spaces in the source should not be important. Some BASICs tokenise the input and remove all spaces, so run-time is faster. Some Tiny Basics leave the spaces in and therefore take time to skip over them at run-time, so lets remove spaces where we can.
  • Multiple statements per line. Try to combine lines where possible, but don’t go overboard.
  • Integer range? Lets use an algorithm that will work in signed 16-bit integers used in some of the very early Tiny Basics as well as the floating point used in larger BASICs.
  • Single letter variables.
  • Easy to type in. So not pages and pages, but should we need to type it in, then you’re not going to resent it. Much.

Here is the code:

100PRINT "Mandelbrot - BBC Basic - FP + Strings"
110PRINT "Start"
120TIME=0:REM Initialise TIME
130Z$=".,'~=+:;*%&$OXB#@ "
140F=50
150FOR Y = -12 TO 12
160FOR X = -49 TO 29
170C=X*229/100
180D=Y*416/100
190A=C:B=D:I=0
200Q=B/F:S=B-(Q*F)
210T=((A*A)-(B*B))/F+C
220B=2*((A*Q)+(A*S/F))+D
230A=T: P=A/F:Q=B/F
240IF ((P*P)+(Q*Q))>=5 GOTO 280
250I=I+1:IF I<16 GOTO 200
260PRINT" ";
270GOTO 290
280PRINT MID$(Z$,I+1,1);
290NEXT X
300PRINT ""
310NEXT Y
320Q=TIME
330PRINT"Finished"
340PRINT"Time: "; Q/100; " secs."

Things to note about the code:

  • Timing: BBC Basic supports a built-in TIME variable. It increments once every 100th of a second.
  • The MID$() function starts with an index of 1.
  • My own 6502 SBC has an operating system that lets BBC Basic run, but for other BASICs on the same system, then the 100Hz timer is in locations 160,161,162 and 163, so TIME=0 becomes POKE160,0:POKE161,0 and in my TinyBasic it’s !160=0

Sample Outputs:


Text Mandelbrot - TinyBasic - signed 16-bit integers

Gordons TinyBasic – 16-bit signed integers

Mandelbrot - BBC Basic with floating point

BBC Basic with floating point

ASCII Text Mandelbrot

EhBASIC – An MS style Basic with floating point


The differences are going to be with integer truncation but the important part for the benchmark is that the code is the same in both cases.

And last thing to note when running these on your own system: My system is a 16Mhz 65C02 which can run a variety of BASICs. If you’re running this on an older or classic 1 or 2Mhz system, then expect the timings to be much longer…

APRICOT – A PRogrammable Interactive Calculate O Tron

What a weird name, but I wanted something with calculate and tron it it, so there you go…

What is it?

APRICOT is a programmable calculator. A very simple one but it’s quite effective and Turing Complete if you want that sort of thing.

Why?

Many years back I wrote what I considered my ideal BASIC – I wrote it in C and have enjoyed using it over the years. I’ve shared it and there are a few active users out there too.

I did feel that while it was a good, full-featured modern implementation of a traditional BASIC that it was a bit big. I could not even think about running it on an old (or retro) 8-bit CPU so have looked at various “Tiny” BASICs and other languages, etc. (Except Forth or Forth-like languages. I am simply not interested in these). One that caught my eye was VTL and VTL-2 which can run on a 6502 CPU in under 1KB of RAM.

Trying to port VTL-2 to my own Ruby 6502 system proved to be a little problematic – mostly due to the amount of Zero-Page required, so in the best traditions of time, ie. How Hard Can It Be? I decided I’d write my own little language.

Inspiration?

So VTL-2 may have been an inspiration, but my thoughts went back to my first programmable calculator the Casio FX-502P. Also my favourite behemoth of a calculator; The Harwell Computer, or WITCH.

What to write it in?

My initial thoughts were to write it in 65C02 assembly language – that might make it accessible to most folks who have 65C02 SBCs or older systems with a 65C02 CPU.

That hasn’t happened – yet.

I started in BCPL because I have a 65C816 system that can run BCPL (and edit and compile BCPL directly on-board) I thought it might be quicker to get the ideas and basics flashed out in a higher level language then hand-translate it into 6502 code.

It was quicker to get going and I had the basics going in a few hours, but being one of 2 or maybe 3 other BCPL programmers in the world, it’s not that accessible, so to make it a little more accessible, I re-wrote it in C. Currently I’m keeping the BCPL and C versions in-step with each other.

What’s in a number?

I decided that to keep things simple and in the traditions of VTL-2 and various Tiny BASICs that I’d stick to integers – specifically 32 bit signed integers. Apple Integer BASIC was only 16-bits and good enough at the time but the BBC Micro supports 32-bit integers so 32-bit it was.

Interactively it works just like an old-school calculator. There is no operator precedence as such and operators are actioned when they are entered. So 1+2*3 is 9 and not 7 as some people might expect.

How to get it?

Head over to the downloads page to get the manual and the C source code along with some examples and even a couple of games…

You will need to know how to unpack a .TGZ file and compile a C program to use it. There is a short README file there but not a lot else…

tl;dr:

cd /tmp
mkdir apricot
cd apricot
wget https://project-downloads.drogon.net/apricot/apricot.tgz
tar xfz apricot.tgz
cd apricot-c
make
cd ../examples
../apricot-c/apricot
--- then load an example or 2
--- see the apricot.pdf for full documentation.

A short example

This is a recursive factorial function..

"Number? " ? ;F
"Factorial is: " . #
_

`Factorial
(F
  = T - 1 [ T \ T ) 1] ` If T is 1 then return
  , - 1 ;F = T ' * T )

and this is integer square root:

` Integer Square root
` Herons Method
` Uses S
` Uses but preserves X and Y.

(Q
  = S
  > 2 [ \ S ) ]
  X,Y,
  S / 2 = X
  S / X + X / 2 = Y
  1[
    Y = X
    S / X + X / 2 = Y
    Y < X ]
  X = S
  '=Y '=X S
)

Is an esoteric language? I don’t know, but it is quite usable though. At least I think so!

Retro BASIC and BCPL Benchmarks

Doing some tinkering with my retro BCPL system recently and while I’ve always though it was faster than BASIC on the same hardware, I never really worked out just how much faster it really was…

So as it was a retro system, I ran up some properly retro benchmarks (and a few new ones) just to test.

The TL;DR

The good news? Yes! It’s faster! The less good news – it’s not as fast as I feel it could be. It may also seem that some of the benchmarks “cheat”. See the bit below about floating point.

Benchmarking

So lets look at the benchmarks and talk about benchmarking in general.

Benchmarking is not something I’m unfamiliar with – I’ve been involved in the field of supercomputing in the past and there we had a whole suite of tests to do – as well as some people employed just to run (and tweak) those benchmarks, so having seen that tweaking in the past I’ve tried hard to keep the benchmarks fair over the different versions of BASIC I have used, as well as the compiled BCPL.

Remember too that these benchmarks are synthetic benchmarks – meaning that they may not represent the real-life programs we want to run. Would blisteringly fast floating point performance affect an editor or compiler for example?

The Benchmarks

The benchmarks I’ve used are not the ones aimed at “power” users, but a mix of the old ones that appeared in various magazines of the time which are suitable for those computers – that’s the late 1970s to the mid 1980s and a few newer ones which are still suitable for those old systems.

  • The Rugg/Feldman benchmarks -1977: Wikipedia
  • The Byte Sieve benchmark – 1981: Wikipedia
  • Interface Ages Prime Cruncher benchmark – 1980 : Archive.Org
  • Noels Retro Lab BASIC benchmark – 2020 (ish)
  • My own Text/ASCII Mandelbrot. (2019-2023)

Hardware

The hardware I’m using is my own designed Ruby 816 system – it has a WDC 65C816 CPU, 512KB of RAM and runs at 16Mhz. The ‘816 is the so-called 16-bit 6502. For the BASIC benchmark runs the CPU is running in 65C02 emulation mode so it’s essentially the same old 6502 that was in the Commodore PET, Apple II, BBC Micro and so on. The 65C02 was used in the BBC Master and BBC Basic version 4 takes advantage of the extra instructions this CPU offers.

The BCPL tests run the CPU in native 16-bit mode. The BCPL environment is actually a 32-bit one, so to make that work there is a bytecode interpreter at its heart. This is written in hand-coded 816 assembler.

BASICs and BCPL

The BASICs I’ve tested are:

  • BBC Basic – Versions 1,2,3 and 4. Note that version 4 requires the 65C02 which is what the 65816 actually emulates at power-on time.
  • EhBASIC – This is a BASIC written by the late Lee Davidson which is based on a disassembly of a Microsoft 6502 BASIC. It’s a version that has been tweaked to use some 65C02 features.
  • CMB2 BASIC – The same BASIC that runs on the Commodore PET, VIC-20 and C64 computers. It was assembled from source and tweaked to run on the Ruby hardware system.

The BCPL is Martin Richards 32-bit 2014 compiler running on the same hardware with the CPU running in native 16-bit mode. The compiler outputs a bytecode (called CINTCODE) for a 32-bit virtual machine which is subsequently interpreted by hand written 65816 assembly code.

The tests were edited and run directly on the Ruby816 system.

And then there’s floating point

After a few runs and tests it became apparent that BCPL as going to win but not for the reason that might initially be obvious… BASIC uses floating point numbers more or less by default. BCPL is more or less integer by default. Some BASICs can use integers but the older, Microsoft variants do this very inefficiently. BBC Basic is the exception here but even then, trying to make sure everything is worked out as an integer can be tricky.

So… What I’ve done is tried to do 2 versions of the BCPL benchmarks. It’s not perfect as things like FOR loops in BCPL are implicitly integers but most of the Rugg/Fielding benchmarks are essentially WHILE loops, so that works out OK.

One just didn’t work well though – the Byte Sieve simply wasn’t appropriate for conversion to floating point, so it’s not included (An integer version is). Noels Retro Lab benchmark was converted using a WHILE loop in the same way the Rugg/Fielding ones were. The floating point Mandelbrot is a line for line translation of the BASIC source (with GOTOs and all) but I added in a scaled integer version – it’s not quite identical, but close enough to be representative.

And in a somewhat surprising twist of fate, there are some occasions where BBC Basic 4 was FASTER than BCPL at floating point. Why? Well… Rather than hand-code IEEE754 floating point in 65C816 assembler, I arranged for BCPL to use the on-board ATmega as a floating point co-processor, so it should be fast? well it is, but due to the way the 2 processors talk to each other the latency is somewhat high. The net result is that doing a lot of trivial calculations (like add/subtract) takes longer in BCPL than in BBC Basic4. Is it worth doing anything about it? Maybe, but not right now…

Timings

Rather than try to use a stopwatch, I have used the timing facilities provided by the RubyOS.

When running in 6502 emulation mode, RubyOS provides a 100Hz ticker to make the BBC Basics the built-in TIME function works as it ought. The other BASICs use their PEEK and POKE commands to access the memory locations that the ticker uses. There is the potential for a mis-read, but I feel this would not happen often enough to be an issue and if it did then the results would be obvious, so a simple re-run would give the true result.

The BCPL system running in native CPU mode has a 1000Hz ticker and this is used when running the BCPL benchmarks.

I ran each test a minimum of three times and picked the time that was the same over 2 runs. So e.g. if I saw 1.24, 1.24 and 1.23 then I picked 1.24. When I got 3 results that were very close but different, I ran it a few times more until I got 2 the same. Might be marginally scientific, but it’s good enough.

The results:

Benchmarks Table


BCPL is generally faster, but it’s easier to gain speed by use of integer loop counters in FOR loops and so on, however even when using floating point there are gains to be had as the compiler makes a good job of turning the text program into something much more compact and easier to execute – even if it’s is still being run inside an interpreted virtual machine.

BBC Basic improved from version 1 to version 4 – in particular the floating point code was extensively optimised to use the 65C02 instruction set in Basic4.

EhBASIC is a fraction slower than CBM Basic 2 but both come from the same Microsoft background. BBC Basic is much faster in all cases, but it is a larger BASIC and was written some years after Microsoft BASIC.

Source Code?

If you want it, it’s here

Conclusion

  • The world doesn’t need another retro computer benchmark – mostly because we’re not running into shops in the early 80’s and seeing who has the fastest BASIC. The BBC Micro won that war for something vaguely affordable (back then, anyway).
  • Compiled languages are faster.
  • BBC Basic4 is almost twice as fast as Microsoft Basics.
  • BCPL can be up to 8 times faster when you cheat and re-write the benchmark to use integers, but even with floating point it’s still mostly 2 to 3 times faster.
  • My Ruby816 board has performed remarkably well. allowing me to edit and test all the code in these benchmarks. The BCPL compile runs directly on it and while not the fastest thing, wasn’t that slow to make it unusable. Compiling the integer point Mandelbrot takes about 4.5 seconds.


The Humble “Glass Teletype” and the Lazy Programmer…

Way back we had mechanical output devices for our computers. These were big, slow, noisy and really a spill-over from the days of the telegraph, but they fulfilled their purpose and much code, including early Unix was written using them. Teletype Corporation are possibly the most well known ones of the time, although there were many other manufacturers, but when you see a picture of a mechanical printer it’s almost always a “Teletype” (And even when not, it’s almost become a generic word anyway).

Teletype ASR-33

Fast forward to today and we have big, fast screens and editors that do much much more than the old line-oriented editors of yester-year.

But what happens when you build a retro-style computer, running at retro speeds and you want a screen orientated editor?

Well, in the first instance, you write it, test it, use it and it’s great. In my case it’s talking to my desktop PC at 115200 baud (that’s just over 10,000 characters a second, so to fill a typical 80×25 character display takes about a fifth of a second. Acceptable. I’m also using a custom terminal program of my own making and while it’s a relatively “dumb” terminal its clever enough to only update the screen when needed, and as that update is not constrained by the speed of a serial connection it appears to be really smooth and fast, but naturally, I wanted to see what it would be like on a real (or emulated) terminal…

The 1970’s

But lets wind back some years to the mid 1970’s. Computers were still relatively slow but advances were being made in the terminal department. Mechanical printers were now up to about 30 characters per second (from the original 10) and were quieter, but were slowly being deprecated in favour of the new “Glass Teletypes”.

Glass Teletypes?

These fully electronic devices were initially limited in what they could do. Print from top to bottom, scroll upwards and… Well, that’s about it. The limitation was mostly due to the electronics at the time – Memory was still expensive, logic circuits (rather than a microprocessor) were still in-use, so it was not uncommon to see a rather large board stuffed full of TTL ICs driving the CRT (Cathode Ray Tube, often just called a “Tube” in some cultures) typically green phosphors on a black background. If you were very lucky you might have one with Orange phosphors.

Time marches on…

But nothing stays still for very long and terminals (as they were now being called) were becoming more sophisticated – under program control, the location of the cursor could be changed – some could scroll down as well as up. Partial screen clears (say from the current line to the bottom of the screen, or cursor position to the end of the current line). The net result was that “Screen Editors” could now be a thing and while programmers (initially) still used older line-orientated editors for code, ordinary users now had things like “word processors” which used the whole screen and allowed for easier editing of text for documents, letters and so on. WordStar one of those and that was first published in 1978 and relied on these new smart terminals to work.

1978 also saw the introduction of “personal computing” as we might know it today. Relatively affordable computers with screen, keyboard and storage – aimed at small businesses and serious (as they were expensive!) home users and education. The Apple II, Commodore PET and the Tandy/Radio Shack TRS-80 were the three main contenders then.

But what about the old “Glass Teletype”? They were still in-use for a long time – they were an economical device to connect to larger multi-user time sharing systems and so they lived on for quite a few years. Today they may be considered a bit of a relic. An anachronism or just something for the new kids to laugh at… (imagine a screen and keyboard with no computer!)

Retro (and vintage) Computers…

In the world of vintage or retro computers the Glass TTY is still very much a thing, so for my Ruby project I decided to see how it would work with one – although I do have a real terminal, I chose to use an emulator on my Linux desktop using the PuTTY software.

Lazy programmer…

And what I found was that over the years I’d obviously become quite lazy when it comes to screen handling. Ruby was intended to be vaguely Acorn/BBC Micro compatible when it came to screen handling – and it is, but the Acorn MOS screen handling is very much lacking in facilities required to drive a serial terminal, so while it has cursor move screen clear  and scroll facilities, that’s just about it. And although there are text window facilities (to define an area not a modern “window” in a big graphical user interface) you still need to do a lot to e.g. insert a line or character or clear to the end of the line or page.. The net result was that my editor while ran quite well with my own terminal program ran rather poorly when used on a real (or emulated) ANSI terminal.

So back to the drawing board and the old days of working out screen codes, ESC [ then the magic codes. fortunately a standard had emerged which most people just refer to as ANSI. The hardest part? Making the arrow keys and command keys (Home, End, etc.) and even worse the Function keys work. It may be a standard, but there are many interpretations of that standard…

However some work on the VDU handling code in my RubyOS and in my own SDL based RubyTerm and of-course in my editor and other home grown utilities that run on the Ruby board and it’s now running as well as it might have done back in the early 80’s on a real terminal.


Ruby816 – Solving the bootstrap paradox

Previously I wrote about the issues bootstrapping BCPL on my Ruby board and I was moaning about needing a C front-end or “shim” to get BCPL going.

So I engaged the little grey cells and worked out a strategy…

What I’ve done is to write sufficient ‘816 assembler code to initialise the BCPL global vector and create a stack, then to point the cintcode program counter to some embedded cintcode (embedded into the ASM program as a binary blob), and call the cintcode interpreter.

At this point the bootstrap program can call local functions but not global ones. The “blob” is actually the bare minimum in terms of library calls to get BCPL fully going. I created it by simply concatenating the files (sections) and turning them into a form I can include in-line with the assembler source for the cintcode interpreter.

The BCPL bootstrap fixes-up the global vector by scanning the concatenated section images and working out the correct offsets to populate the global vector with. The first call I then make is the getvec setup call to initialise the memory for subsequent allocations, then I call the loadseg() function to load the rest of the library files into RAM as before with the C front-end. It’s already running BCPL at that point, so the last file it loads is the command line interpreter which is loaded and called and the system is ready. This is slightly quicker than the C front-end too as some of the library routines are loaded with the interpreter and remain there for the rest of time.

And so the paradox is no more!

Ruby BCPL Bootstrap

Ruby BCPL Bootstrap

A Day at the Races

We have a nice point to point racetrack in (near) Buckfastleigh, so today we went over for the first race of the season.

One of the horses that is stabled/trains at the yard where I ride out from was racing today, so it was really nice to see her in action. She didn’t win but was the best turned out for he race thanks to the hard work of Trudi in the stables.

I made a very little video from the clips and pictures I took. Enjoy!

Home Artisan Microbakery – 3/3

Stage 3, but if you missed it, then back to the mix and knead step… or  back to the preparation step

The Big Bake

The next morning comes – round about 5:45am and the dough has risen!

Dough has risenHooray and up she rises… early in the morning!

The task now is to do the usual clean and sanitise, get the ovens on and get the dough scaled (measured) out and into proving baskets, tins and so on. Additionally, on this particular day I have the added pressure of sticky buns… These are made in the morning from scratch using a fairly standard enriched dough recipe (with eggs, sugar and milk), filled, baked, glazed and sold… Todays were cardamom and cinnamon.

Starting with the sourdough:

scalingThe dough is tipped onto the counter and weighed out into the size I’m after. These are medium (600g) loaves so the dough is a rather generous 740g. After scaling, the lumps are shaped into boulles before final shaping.

pre shaped boullesThese are just rough rounds. I then get the proofing baskets and couch ready

baskets and coucheand do the final shaping and leave them covered to rest and rise a little more. This is being done against the clock, so that’s 24 (actually 25 as there was a bit of spare multiseed dough) loaves and I aim to have this all done inside half an hour.

Rye into the ovenMeanwhile the Lincat oven is up to 200°C and the rye loaves which I’d gotten out of the fridge earlier can go in with a big blast of steam…Not forgetting to set a timer!

more scalingThese are the wholemeal and cheese breads scaled and pre-shaped… There will be 2 cheese loaves, a batch of cheese sticks and 2 cheese rolls for the lovely staff in the cheese shop in Totnes…

wholemealsThe wholemeals are in tins.

cheese loavesThe cheese loaves are roughly shaped, filled with cheese cubes and rolled into a log.

cheese loaves proofingThese are left to rise in these baskets along with the cheese rolls which I’ve also stuffed with cheese…

sticky bun doughMeanwhile, I’ve made up the sticky bun dough – threw it all in the mixer, let it knead and transfer it to a bowl to rise.

cheese sticksThis is the start of the cheese sticks. Pull the dough out into a rough rectangle, 2/3 cover in grated cheese then fold, roll, turn and repeat another3-4 times…

more cheese doughGetting there..

cheese stick doughDone – for now. It’s covered with the (recycled) cling film and put in the fridge for an hour or so to relax.

Baked ryeThe rye breads are usually done by now, so they come out and are left covered in their tins for another 10 minutes or so.

ready for ovenAnd now it’s about 7:45 or so – I’ve had to do a round of washing up/cleaning and lifted the risen dough to the silicone sheets that go into the Rofco oven and attacked them with a razor…

dough close upThis is a closer view of one of them – I’m using a large plywood sheet that has been cut to the exact width of the Rofco to load them into the oven.

loading 2After loading the Rofco, I’ve more to go into the Lincat. These are transferred directly onto the board with a bit of flour then into the Lincat.

Lincat loadedThis is the Lincat loaded with the dough – there’s that extra loaf at the bottom (the bakers own!)

sticky bun dough risenMeanwhile the bun dough has risen and we need to tip it out, roll it into a rectangle, cover it with the filling mix (butter, sugar, cardamom), fold and cut, twist and knot…

yum...cutThey’re all the same size… honest!

buns to riseLeft to rise…

What next – it never stops here… I think the wholemeals might be ready to go into the oven.

wholemeals bakingOr maybe this was when they were done…

Inside the rofcoThis is the breads inside the Rofco oven. After 12-15 minutes, I open the door and whip out the silicone sheets to let them bake the rest of the time directly on the stones.

bakedAnd here they are…

cheese loavesThe cheese loaves and rolls are ready to go into the Lincat oven…

buns risenAs are the buns…

baking bunsmorebakingTiming is key here…

baked wholemealsThe wholemeals are out …

chese sticksAnd don’t forget the cheese sticks – this is the cheesy dough out of the fridge…

sticksRolled and cut …

baking sticksand in the oven.

baked cheeseThe cheese loaves and rolls are baked…

baked bunsAs are the buns (covered in honey sticky glaze now)

cheese sticks bakedThe cheese sticks are baked too.

PackingAnd finally it all needs to be packed up into boxes and taken to the shops and it’s in the shops by 10am while it’s still warm…